【碗仔米糕】
by 毛毛妈
这个米糕是软软QQ的非常好吃,不妨试试。
 用料:
用料:
1:大米1/2杯(104克),水2/3杯(160克);
2:玉米面(corn flour)3大匙(25克),中筋面粉1/2杯(all purpose flour,84克),泡打粉(baking powder)1茶匙,拌匀;
3:糖1/4杯(51克),水2大匙(30克),快速发酵粉(instant yeast)1茶匙;
4:枸杞子15粒,冲洗干净。
注:1大匙Tablespoon =15毫升,1茶匙Teaspoon =5毫升,1杯Cup=240毫升。
做法:
1、大米洗净,加2/3杯水浸泡24小时。连米带水一起倒进搅拌机(blender,图1)打2分钟成米浆,然后倒入中号盆里(图2)。
2、接着加入所有2和3料(图3),用勺子搅拌均匀(图4),盖上保鲜膜,放在暖和的地方,发2小时到米面糊发至原来的两倍大(图5)。再用勺搅拌几下,将发好的米面糊分5份倒入底部铺了烤盘纸的小碗里,醒40分钟。

3、醒好的米面糊上放3粒枸杞子,取出快煲电压力锅附带的支架,放入内锅里,加水2杯,将盛米面糊的小碗放上支架上(图6),盖上盖子。选蒸档(Steam)14分钟,启动程序。
4、电压力锅完成程序后,等15分钟,放气减压打开盖子,稍冷后用一小刀沿碗内边划开米糕,撕去底部的烤盘纸即可食用。


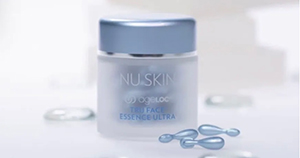 My favorite serum, to deliver visibly firmer, more contoured, lifted, and defined skin!
  Beauty focus Collagen-Provides antioxidants for the maintenance of good health, Protects against the oxidative cell damage caused by free radicals! To purchase click here: Beauty focus Collagen.
  ageLOC Meta, powered by anthocyanins-natural health beneficial compounds found in the deepest purple berries and black rice. It helps support things like metabolic health and core metabolism, helps maintain healthy blood glucose, for better gut health…

Your blog is a go-to resource for me. Thanks for all the hard work!
of course like your web site but you need to test the spelling on quite a few of your posts. Many of them are rife with spelling problems and I in finding it very bothersome to tell the truth however I will surely come again again.
Your writing style is captivating! I was engaged from start to finish.
“Your unique perspective on this topic was truly enlightening. It’s refreshing to encounter such passion and new ideas in your field, and it’s evident that you are deeply invested in this subject.”